Reviving a broken laptop
What do you do when your laptop breaks? If you're like me, you try to find a way to give it a second life. You either replace the broken parts, or, some times, you just imagine other ways to repurpose the laptop.
Back story
In 2014 I bought a laptop. A kind of cheap one, planning to keep it for 5 years. It was a Lenovo G500 which happily served me for years as my main computer. Running Linux of course. Sometime in 2018 - 2019 I had the usual mental itch, which resulted in doubling its memory and replacing the initial SHDD with an SSD. At that point it was fully functional without any performance issues.
In 2020 my daughter moved in with me and she needed a laptop for her school assignments. The laptop was more than adequate for it, so I gave it to her to use. The usage turned from 2-3 hours per day for assignments, to almost 14 hours per day for online classes, assignments, and web surfing due to the pandemic-induced lockdown. The laptop served me and my daughter well until the end of 2020.
It had to be replaced
Unfortunately, at the beginning of 2021 its LCD screen started giving up. I got another laptop for my daughter, and I have to say that finding a respectable laptop at an affordable price range is definitely not an easy thing!
But the old laptop, a system with an Intel Core i3 3110 processor, 8Gb of RAM and 256Gb SSD, is perfectly good to be thrown away. It was fully functional with the exception of the screen. I had three options:
- either replace the screen, or
- use it as a desktop system permanently connected to an external screen, or
- repurpose it altogether.
I did not need another laptop, and I built a desktop just two years ago. Plus, if you are like me tinkering with computers all the time, you do realize that option 3 was the most attractive one!
New life as a dedicated IOT device
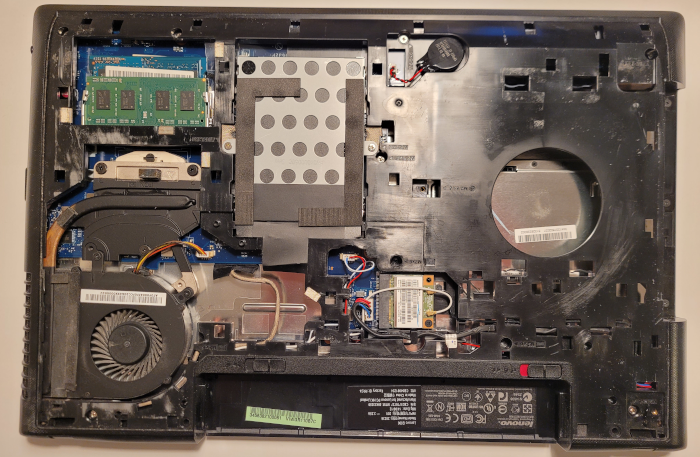
I decided to make the old laptop a system, running 24x7 so practically a server or IOT device, that would host my Home Assistant. After watching a couple of YouTube videos, taking the laptop apart seem to be quite easy. And indeed, it was.
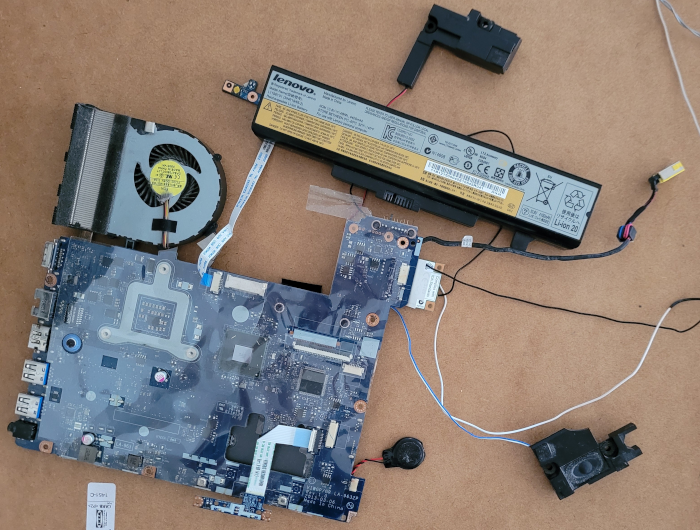
 While taking the keyboard out I was worried that I will break it, in the end all parts came out nicely and when re-connected, they were all fully operational.
Although all the parts were operational, not all of them are needed for a system that serves as a home assistant. So I got rid of the TouchPad and the keyboard, the DVD and the broken screen. I kept the speakers and the microphone since both have their use in a (even voice-enabled) Home Assistant. The camera, which is still "bundled" with the microphone, is also there and operational; of course it doesn't do anything at the moment.
 It is very good that laptops have batteries. Connecting the battery to the motherboard and keeping it in place was tricky, but at least I know that power interruptions won't stop my home assistant from working. Unlike some servers, laptops don't usually have a setting in the bios to automatically start up when power is restored. So despite the fact that it will not be doing anything while power is out (due to power and connectivity loss), it will be able to pick up where it stopped as soon as the power comes back up; hoping that the power outage won't be longer than a couple of hours.
The case
An interesting question is, where do you house this thing? I entertained the idea of 3d printing a case, but I decided against. My partner suggested we put it in a picture frame and hang it up on the wall as a piece of art. Smart thinking, but I didn't like having the electronics shown. This gave birth to a different idea: I would put the system behind a picture. Or, in our case, a tin plate. More challenges came up, about how you stabilize the electronics behind a plate. I could not find motherboard spacers easily, due to the limitations of visiting stores during lockdown (and it was not worth buying just some spacers online).
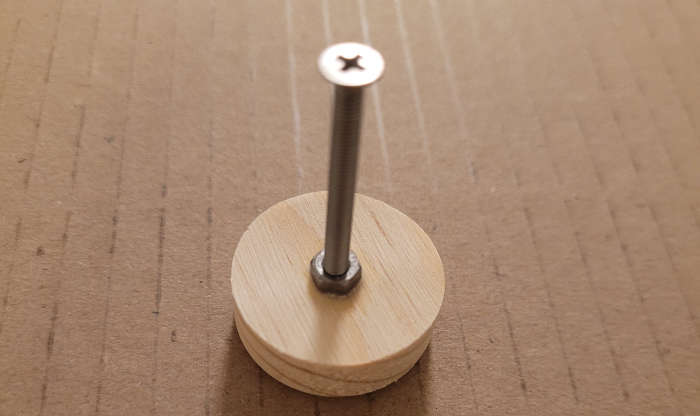
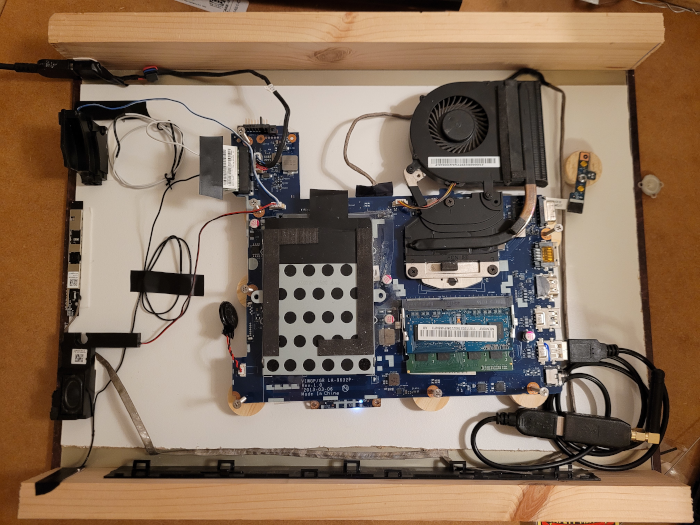
 I had to make do with whatever I had at home. So I constructed a wooden frame and put it around the tin plate. I also glued an MDF sheet behind the tin plate, on which I used wooden spacers with M3 screws, to replace the motherboard spacers that I didn't have.
 I used electrical tape to stabilize the speakers, the microphone and the Wi-Fi antennas. I made sure to put the Wi-Fi antennas on the one side of the plate and the Zigbee controller on the other side to avoid any interference.
I "closed" the case by attaching another, smaller MDF sheet on the back. This is not really closing the case, but stabilizes somehow the motherboard and the parts. Air still flows freely from the one side to the other. I may, in the future, add a metal mesh, just to make sure no fingers accidentaly get in there.

The software
I have set up a Home Assistant instance on a NUC. This is actually a virtual machine running on VirtualBox. Copying it to the new system was easy, starting up the VM was just a matter of removing the old USB devices and usb filters, and registering the new ones. At the same system I was running a Rhasspy container which voice-enables my assistant. I re-set up Rhasspy as it relies on the audio subsystem, which was different between the two installations.
What did I achieve?
Looking back, I have to admit that the internal Lenovo microphone is impressive. It picks up the wake word and any commands from 6-7 meters away. This is more than I expected and although I had planned to use an external microphone, I'm happy to say that I don't have to. The speakers on the other hand are not so good. They are tolerable, and using larynx TTS provides great results although it is slightly slow. Since I don't need an external microphone, I will not use external speakers. The "invisibility" of the computer is important in this project and I can live with the not-so-good response from the speakers. If I ever change my mind, I always have the option.
The system runs quiet and perfectly silent. The CPU usage is minimum, the temperature is consistently below 42 C and the fan never needs to wake up (although, obviously, I tested that it does wake up when needed).
The system provides an offline, voice enabled home assistant. The "offline" part comes with limitations - i.e. some training is required for new functionality, but this is definitely fine with me since I value the absence of Alexas and Nests from my household.